Free GPX Viewer Tool: Explore Any Camino Route Before You Walk It
Posted: | Updated:
Reading time: 12 minutes
Posted: | Updated:
Reading time: 12 minutes


By: Simon Kemp , Editor
Free GPX Viewer: see your Camino route before your boots touch the trail
Planning a Camino is a mix of excitement and nerves, especially if it’s your first time. Even if you’ve walked multiple routes, it’s still reassuring to see tomorrow’s stage laid out clearly: where it starts, where it ends, how far it is, and how much climbing you’ll do.
That’s exactly what the GPX Viewer is for and it’s part of out suite of free GPX Tools.
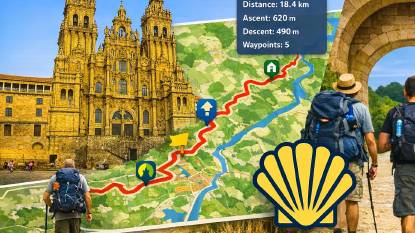
This tool lets you load any GPX file, see the route on a big interactive map, and read clear stats like distance, ascent, descent, and waypoints. It’s simple enough for a complete beginner, but detailed enough that experienced pilgrims can use it to compare routes, check file quality, and sanity‑check stages.
This article walks you through the GPX Viewer in depth, what it does, how the interface is laid out, and exactly how to use it step by step.
🧰 GPX Viewer Features at a Glance The table below summarises everything the GPX Viewer can do, based strictly on the real interface and behaviour of the tool.
| Feature | What It Means | Who It Helps |
|---|---|---|
| Load a GPX file | Upload a .gpx file from your device using a simple “Choose File” button | Everyone , it’s the starting point for viewing any route |
| Single‑file viewer | The tool loads one GPX at a time for clarity and simplicity | Beginners who want a clean, focused view |
| Interactive map display | The route appears on a large, zoomable, pannable map | Anyone wanting to visually explore a stage |
| Automatic zoom‑to‑route | The map automatically adjusts to show the full track | Saves time and avoids manual map adjustments |
| Track line rendering | The GPX track is drawn clearly on the map as a continuous line | Helps visualise the shape and flow of the stage |
| Waypoint display | If the GPX contains waypoints, they appear as markers on the map | Useful for spotting albergues, cafés, fountains, etc. |
| Track name display | Shows the name stored inside the GPX file | Confirms you loaded the correct stage |
| Distance calculation | Displays the total length of the track | Essential for planning daily walking distances |
| Ascent & descent stats | Shows total climb and total descent | Helps judge difficulty and prepare for steep days |
| Point count | Shows how many individual points make up the track | Useful for experts checking file complexity |
| Segment count | Shows how many segments the track contains | Helps identify breaks or splits in the GPX |
| Waypoint count | Shows how many POIs are included in the file | Useful for checking if a GPX includes albergues or landmarks |
| Collapsible control panel | The floating card can be collapsed to maximise map space | Great for small screens or detailed map inspection |
| Filename display | Shows the name of the selected file next to the upload button | Helps avoid loading the wrong file |
| Loading modal | A small “Loading GPX…” popup appears while the file is processed | Reassures beginners that the file is being handled |
| Clear button | Removes the current GPX and resets the viewer | Lets you quickly load another file |
| Language‑aware interface | Labels and text adapt to the user’s language | Helpful for international pilgrims |
| Clean, distraction‑free layout | The map is the focus, with controls tucked neatly in a floating card | Ideal for both novices and power users |
1. What the GPX Viewer is (and what it isn’t)
The GPX Viewer is a view‑only tool for Camino routes. You use it to:
- Load a single GPX file from your device
- See the route drawn on a map
- Read key stats about the track:
- Track name
- Total distance
- Total ascent
- Total descent
- Number of points
- Number of segments
- Number of waypoints
- Clear everything and load another file
It is not an editor. You don’t change the route here, you don’t move points, and you don’t export a modified file. For editing, you’d use tools like the GPX Builder, GPX Editor, or GPX Simplifier.
Think of the Viewer as your “first look” and “sanity check” tool:
“Is this the right file? Does the distance make sense? How hilly is this stage? Does it even contain a route?”
2. When you’d use the GPX Viewer
Both first‑time and experienced pilgrims can get a lot out of this tool.
For first‑time pilgrims
- To see tomorrow’s stage the night before
- To understand how far a day really is
- To get a feel for how much climbing is involved
- To check that a downloaded GPX file actually contains a route
For experienced pilgrims
- To compare alternative variants (e.g. coastal vs inland)
- To check file quality (too many points, missing waypoints, etc.)
- To verify that a GPX from a blog or forum is sensible and usable
- To quickly inspect waypoint counts (e.g. albergues, cafés, fountains)
3. A guided tour of the interface
When you open the GPX Viewer page, you’ll see a clean layout built around the map.
3.1. Page header
At the top of the card:
- A big title (e.g. “GPX Viewer”)
- A short description explaining what the tool does
This sets the context: you’re in the right place to view GPX files.
3.2. The main map area
Below the header, the main content is dominated by a large map:
- It fills most of the screen height (about 75% of the viewport)
- It stretches the full width of the content area
- Initially, it shows a default map view
- Once you load a GPX file, the map zooms and pans to show your route
You can:
- Pan by clicking and dragging
- Zoom in and out using the map’s controls or your mouse/touch gestures
This is where your Camino route will appear as a line once you load a file.
3.3. The floating control card (top‑right)
On top of the map, in the top‑right corner, there’s a floating card. This is your control panel.
It has three main parts:
- Header
- Body (file upload + metadata)
- Footer (Clear button)
Let’s break those down.
4. The floating card in detail
4.1. Card header: title + collapse button
The header shows:
- The tool title again (e.g. “GPX Viewer”)
- A small collapse button on the right, usually showing a “–” symbol
Clicking this button:
- Collapses the card body (hides the controls and metadata)
- Leaves just the header visible
- Clicking it again expands the card back
This is useful when you want to see more of the map but still keep the panel handy.
4.2. File upload section
This is where you load your GPX file.
You’ll see:
- A label like “Load GPX file”
- A primary button with an upload icon and text like “Choose File”
- A hidden file input (the browser’s actual file picker)
- A filename display area showing either:
- The name of the selected file, or
- A default message like “No file chosen”
- A small helper text line indicating accepted formats (e.g. “Accepted format: .gpx”)
How it behaves
- You click the “Choose File” button.
- Your browser opens the file picker.
- You select a
.gpxfile and confirm. - The filename display updates to show the chosen file.
- The tool begins processing the file and shows a “Loading GPX…” modal.
4.3. Metadata section
Below the upload controls, there’s a block that initially is hidden. Once a GPX file is successfully loaded, this block becomes visible and shows the route’s stats.
The metadata fields are:
- 📋 Track name – the name stored inside the GPX file
- 📏 Distance – total length of the track
- ⛰️ Ascent – total climb
- ⬇️ Descent – total descent
- 📍 Points – number of track points
- 🔗 Segments – number of track segments
- 🏷️ Waypoints – number of waypoints (points of interest)
Each value is displayed next to its label, in a compact, easy‑to‑scan format.
This section is especially powerful for both novices and experts:
- Beginners get a simple summary: “How far? How hilly?”
- Experienced walkers get technical insight: “How dense is this track? Does it have waypoints? Is it over‑detailed?”
4.4. Card footer: Clear button
At the bottom of the card, there’s a footer with a single button:
- A secondary button, full width
- Labelled something like “Clear”
This button is used to reset the viewer:
- Remove the current route from the map
- Reset or hide the metadata
- Reset the filename display
After clearing, you’re back to a clean state and can load another GPX file.
5. The “Loading GPX…” modal
When you select a file, a small modal appears in the center of the screen:
- A spinner animation
- A short message like “Loading GPX…”
This tells you the tool is:
- Reading the file
- Parsing the GPX content
- Preparing the map and metadata
Once the file is processed, the modal disappears, the map updates, and the metadata appears.
6. Step‑by‑step: how to use the GPX Viewer
Let’s walk through the full flow as you’d use it in real life.
Step 1: Get your GPX file ready
Before you open the Viewer:
- Make sure your file has the
.gpxextension - Ideally, it should contain:
- At least one track (the line you’ll follow)
- Optionally, waypoints (albergues, cafés, fountains, viewpoints, etc.)
If you’ve downloaded a GPX from a website, guide, or friend, just save it somewhere you can find easily (e.g. Desktop, Downloads, a Camino folder).
Step 2: Open the GPX Viewer
- Go to the GPX Viewer page in your portal.
- Wait for the page to load fully.
- You should see:
- The title and description at the top
- The large map
- The floating card in the top‑right corner
Step 3: Load your GPX file
- In the floating card, look for the “Load GPX file” section.
- Click the primary “Choose File” button with the upload icon.
- Your browser’s file picker opens.
- Navigate to your
.gpxfile and select it. - Confirm your choice.
After this:
- The filename display updates to show the name of your file.
- The “Loading GPX…” modal appears while the file is processed.
Step 4: View the route on the map
Once the file is loaded:
- The map automatically zooms and pans to show your route.
- You’ll see a line representing the track.
- If the GPX contains waypoints, you may see markers at those locations.
You can now:
- Pan around the map to explore different parts of the route.
- Zoom in to inspect tricky sections (e.g. steep climbs, junctions, town entries).
- Zoom out to see the full stage in context.
For a novice, this is often the first moment of “Oh, that’s what tomorrow looks like.”
For an experienced pilgrim, it’s a quick way to verify that the route is where you expect it to be.
Step 5: Read and interpret the metadata
Look at the metadata block in the card. You’ll see:
- Track name – useful to confirm you loaded the right file.
- Distance – total length of the route.
- Ascent / Descent – how much climbing and descending you’ll do.
- Points – how many individual points make up the track.
- Segments – how many separate pieces the track is split into.
- Waypoints – how many points of interest are included.
How a novice might use this
- Distance: “Can I comfortably walk this in a day?”
- Ascent: “Is this a flat day or a tough climbing day?”
- Waypoints: “Does this file include useful stops like albergues or cafés?”
How an expert might use this
- Points: “Is this file overly dense and likely to be heavy on devices?”
- Segments: “Is the track broken into multiple parts (e.g. due to pauses or edits)?”
- Waypoints: “Does this GPX include the POIs I care about, or is it just a bare track?”
Step 6: Collapse the card for a bigger map view (optional)
If you want more space to focus on the map:
- Click the small “–” button in the card header.
- The card body (upload + metadata + footer) collapses.
- Only the header bar remains visible.
Click the button again to expand the card when you need the controls back.
This is especially nice on smaller screens or when you’re studying a complex section of the route.
Step 7: Clear the current GPX and start again
When you’re done with a file:
- Click the “Clear” button in the card footer.
This resets the viewer so you can:
- Remove the current route from the map
- Reset the metadata
- Load a different GPX file
You can repeat the process as many times as you like.
7. Practical Camino workflows with the Viewer
Here are some concrete ways to use the Viewer in your Camino planning.
7.1. Night‑before stage check (novice)
- Open the GPX for tomorrow’s stage.
- Look at:
- Distance
- Ascent / descent
- Decide:
- “Is this within my comfort zone?”
- “Do I want to stop earlier or push a bit further?”
For pre-planned daily stages, see our daily stages guide.
7.2. Comparing two variants (experienced)
- Open the Viewer in two browser tabs.
- Load Variant A in one tab (e.g. official route).
- Load Variant B in the other (e.g. coastal or alternative).
- Compare:
- Distance
- Ascent / descent
- Waypoint counts
This helps you choose the variant that best matches your energy, time, and preferences.
7.3. Checking GPX quality from external sources
If you download a GPX from a random website or forum:
- Load it in the Viewer.
- Check:
- Does the map show a sensible route?
- Is the distance roughly what guidebooks say?
- Are there waypoints, or is it just a bare line?
- Is the point count extremely high (which might make it heavy)?
If something looks off, you can decide not to trust that file, or to clean it up later with other tools.
8. Tips and best practices
Name your files clearly
Use names like:camino-frances-day-01-sjpp-roncesvalles.gpx
This makes it easier to confirm you loaded the right stage.Use the Viewer as your “truth check”
Before relying on a GPX in the field, always open it here once.Don’t worry if you’re not technical
You don’t need to understand what “points” or “segments” are to benefit.
Just focus on:- Distance
- Ascent / descent
- The line on the map
If you are technical, the extra stats are there for you
You can use points, segments, and waypoints to judge file complexity and quality.
9. In short
The GPX Viewer is your safe space to inspect a route before you trust it with your day.
For beginners, it answers:
“How far is it? How hilly is it? Is this really the route?”
For experienced pilgrims, it answers:
“Is this file any good? Does it have the detail and POIs I need?”
This tool is part of the full Camino GPX Tools suite.
Join Us & Get Your Free Downloads!
Signup to our newsletter today to get your free Camino downloads. Get notified about new updates & deals.
