Free GPX Splitter: Break Long Camino Routes into Manageable Daily Stages
Posted: | Updated:
Reading time: 11 minutes
Posted: | Updated:
Reading time: 11 minutes


By: Simon Kemp , Editor
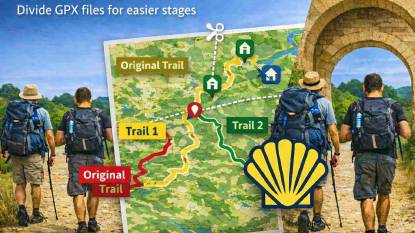
GPX Splitter: cut a long route into daily walking stages
You have a single GPX file for the whole Camino Frances. It is 780 kilometres of continuous route. It looks great on the map, but using it day to day is tricky.
Zoom out to see the big picture? Fine. Zoom in to find tomorrow’s path? Frustrating. Share just one day with a pilgrim you met at dinner? Not possible unless you can cut out that specific section.
That is what the GPX Splitter does. It takes one long route and cuts it into smaller pieces, one for each day you plan to walk. It is one of our free GPX Tools.
This guide explains everything slowly and clearly, even if you have never split a file before.
🧰 What the GPX Splitter can do for you
Here is a simple overview of every feature. Do not worry if some terms are new. We explain them below.
| Feature | What It Means | Who It Helps |
|---|---|---|
| Load a GPX file | Pick a route file from your computer | Everyone with a long route |
| Drag and drop | Drag a file straight onto the map | Anyone who finds clicking easier |
| See file information | Shows the file name, how many points, distance, and how many markers | Confirming you loaded the right file |
| Split by distance | Cut the route into stages every X kilometres (for example, every 25 km) | Most pilgrims planning daily distances |
| Split by markers (waypoints) | Cut the route at specific places you choose, like towns or albergues | Pilgrims who want stages aligned with their bookings |
| Split into equal parts | Cut the route into a set number of equal-length stages | Pilgrims who know how many walking days they have |
| Set the distance (1 to 100 km) | Type the length you want for each stage | Fine control over daily walking targets |
| Pick markers to split at | Choose which markers to use as cut points | Precise control over where stages start and end |
| Set the number of stages (2 to 20) | Type how many equal stages you want | Quick planning when days are fixed |
| Use marker names for stage files | Name each stage file after the town or place at its end | Clear, readable file names |
| Keep notes in each stage | Preserve descriptions and notes in each split file | Keeping your information organised |
| Keep markers in each stage | Relevant pins stay with the stage they belong to | Markers stay useful in each daily file |
| Split Track button | The main button that does the cutting | Everyone |
| Download all as ZIP | Download all stage files in one package | One click to get all your daily files |
| Start Over button | Clear everything and start with a new file | Processing different routes |
| Keyboard shortcuts | Press Ctrl+O to open a file | People who prefer using a keyboard |
| Collapse the control panel | Hide the side panel to see more of the map | Getting a bigger view of your split stages |
| Coloured stages on the map | Each stage appears in a different colour | Seeing where each day starts and ends |
| Works in your language | Buttons adapt to Spanish, French, German, and more | International pilgrims |
1. ✂️ What the GPX Splitter does (in plain English)
The GPX Splitter is a cutting tool. Imagine you have a long piece of string that stretches across Spain. You want to cut it into pieces, one for each day of your walk. The Splitter does this for your digital route.
What you can do with it:
- Load one long GPX file
- Choose how you want to cut it up
- See each piece shown in a different colour on the map
- Download all the pieces as separate files
What it is NOT for:
- It is not for joining files together (use the GPX Merger for that)
- It is not for editing names or markers (use the GPX Editor for that)
- It is not for drawing new routes (use the GPX Builder for that)
Think of the Splitter as a pair of scissors for your route. Snip, snip, snip, and you have perfectly sized daily stages.
2. 🎯 When you might use this tool
Planning your daily stages
Most pilgrims walk roughly 20 to 25 kilometres per day. But a route file for the whole Camino does not know about your daily limits. The Splitter lets you:
- Cut a full route into 25 kilometre chunks
- See exactly where each day starts and ends
- Adjust the chunk size to match your fitness level
- Create files you can load onto your phone one day at a time
Sharing a stage with someone
You meet a pilgrim on the trail who needs tomorrow’s section. With the Splitter:
- Load your full route
- Cut out just tomorrow’s stage
- Share the single file with them by Bluetooth or messaging
Keeping a daily diary after your Camino
If you recorded your whole Camino as one long track:
- Cut it into one piece per day
- Each day gets its own file named by date or location
- Upload individual days to Strava or keep them as a journal
Planning shorter days
Not everyone walks 25 kilometres a day. If you prefer 15 kilometres:
- Load the full route
- Set the distance to 15 kilometres
- The Splitter produces smaller, more frequent stages
- You get more files, each representing a comfortable walking day
3. 🗺️ What you see when you open the tool
When the page loads, you see:
The title at the top – It says “GPX Splitter” with a short sentence explaining the tool.
The big map – This takes up most of the screen. Once you load a file, it shows your route. After splitting, each stage appears in a different colour.
The floating panel on the right – This small box contains all the controls. You can hide it by clicking the “minus” button if you want to see more of the map.
4. 📋 A closer look at the floating panel
4.1. Loading your file
At the top of the panel:
- A button that says “Choose GPX File” or similar
- A space showing the file name (starts with “No file chosen”)
- A hint that says you can also drag and drop a file onto the map
Click the button, find your GPX file on your computer, and select it.
4.2. ℹ️ File information
Once a file is loaded, a small panel appears with:
- Name – The name of the track inside the file
- Points – How many track points the file contains
- Distance – The total length of the route
- Waypoints – How many markers (pins) are in the file
This helps you confirm you have the right file and understand how big the route is.
4.3. ✂️ Choosing how to split
This is the main decision you need to make. There are three methods. Choose the one that suits your style.
Method 1: By distance
This is the simplest and most common method.
- Select “By distance”
- Type the distance you want for each stage (for example, 25 kilometres)
- The tool cuts the route into stages of roughly that length
The last stage might be shorter if the total distance does not divide evenly. That is normal.
Method 2: By markers (waypoints)
Use this if your route has markers at towns or albergues where you want each stage to end.
- Select “By waypoints”
- A list of markers appears
- Hold down the Ctrl key and click the markers you want to split at
- The tool creates stages that start and end at your chosen places
This is perfect if you have already booked accommodation at specific towns and want each stage to end there.
Method 3: By number of stages
Use this if you know how many walking days you have.
- Select “By number of stages”
- Type the number of stages (for example, 10 stages for a 250 kilometre route)
- The tool divides the total distance equally
4.4. Extra options
Three checkboxes give you more control:
- Use marker names for stage files – If ticked, each stage file is named after the marker at its end point. For example, “Roncesvalles.gpx” instead of “stage-01.gpx”.
- Include metadata in each stage – If ticked, notes and descriptions are kept in each split file.
- Preserve markers in each stage – If ticked, markers that belong to a stage stay in that stage’s file.
For most pilgrims, ticking all three boxes is the best approach.
4.5. The Split button
The big button that says “Split Track”. It has a small scissors icon. It is greyed out until you load a file and choose a split method. Click it when you are ready. A message saying “Splitting track…” appears with a spinning circle while the tool works.
4.6. 📊 The results box
After splitting, a box appears with:
- A message: “Split complete!”
- A summary: “X stages created” (for example, “31 stages created”)
- Download All as ZIP – Downloads all the stage files in one package
- Start Over – Clears everything so you can load a new file
The ZIP file contains one GPX file for each stage. You can open the ZIP on your computer and copy individual stage files to your phone or GPS device as you need them.
5. 👣 How to use the GPX Splitter, step by step
Step 1: Load your route file
Click Choose GPX File. Find the GPX file on your computer and select it. Or drag the file from your computer and drop it onto the map.
The file information appears. The map shows your full route.
Step 2: Choose a split method
If you know your daily distance: Choose “By distance” and type your target (for example, 25 kilometres).
If your route has markers at towns: Choose “By waypoints” and pick the towns where you want each day to end.
If you know how many walking days you have: Choose “By number of stages” and type the number of days.
Step 3: Tick the extra options
Tick all three boxes unless you have a reason not to. They make your files more organised and useful.
Step 4: Click Split Track
Click the Split Track button. Wait a moment while the tool works.
Step 5: Check the result
The results box tells you how many stages were created. Look at the map. Each stage is a different colour. Zoom in to check where the split points fall.
Step 6: Download your stages
Click Download All as ZIP. A ZIP file downloads to your computer. Open it to see all your individual stage files.
Copy the first day’s file to your phone. Walk your first stage. When you finish, copy the second day’s file. And so on.
6. 🥾 Real examples of how pilgrims use this tool
Splitting the full Camino Frances into 25 km stages
Lars downloads a complete Camino Frances GPX file (780 kilometres). He opens the Splitter, chooses “By distance”, types 25, and clicks Split. The tool creates 31 stages. He downloads the ZIP and copies the first stage to his phone. Each evening, he copies the next day’s stage.
Splitting at specific towns where he booked accommodation
Pablo has already booked beds in specific towns. He loads the full route, chooses “By waypoints”, holds Ctrl and clicks each town where he has a booking. The Splitter creates stages that end exactly where he plans to sleep each night.
Creating shorter stages for a relaxed pace
Elena wants to walk only 15 kilometres per day. She loads the full route, chooses “By distance”, types 15, and clicks Split. She gets more stages than usual, but each one is a comfortable walking distance for her pace.
Sharing a single day with a fellow pilgrim
Jing meets a pilgrim who needs tomorrow’s stage. She loads her full route, chooses “By distance”, types the approximate distance to the next town, and splits. She extracts just the first stage file from the ZIP and sends it to her new friend.
7. 💡 Simple tips for good results
- The last stage will be shorter – This is normal. It is often a nice short day for arriving at your destination.
- Use markers for better splits – If your file has markers at real town centres, the “By waypoints” method creates more natural stage boundaries.
- Keep the original file – The ZIP contains your split stages. Keep the original full-route file as well in case you want to split it differently later.
- Use with the Merger – If you split a route and later want to rejoin specific stages, use the GPX Merger.
- Test one stage first – Before committing to your split plan, load one stage file onto your phone and make sure it works.
8. 📐 Understanding the three split methods
By distance (simplest)
The tool walks along your route, measuring as it goes. Every time it reaches your set distance (say 25 kilometres), it makes a cut. This is the most straightforward method and works well for most people.
By markers (most precise)
The tool looks at the markers you selected and makes cuts at the closest track point to each marker. This is the most accurate method if your markers are in good locations.
By number of stages (quickest)
The tool measures the total distance, divides it by the number of stages you want, and makes cuts at equal intervals. This is the fastest method when you know your total available days.
9. ✅ Quick summary
The GPX Splitter turns one long intimidating route into friendly daily files you can use one day at a time.
- If you are new, it means: “I can turn this huge route into manageable daily files and take it one day at a time.”
- If you have walked before, it means: “I can share specific stages, align splits with my bookings, and plan at exactly my pace.”
All of our GPX tools live on our Camino Resources Hub, along with other helpful planning materials for your Camino. This tool is part of the full Camino GPX Tools suite.
GPX Splitter Video
Already signed up? Go to Camino Resources Hub A VPN will block the signup form below so disconnect to sign up.