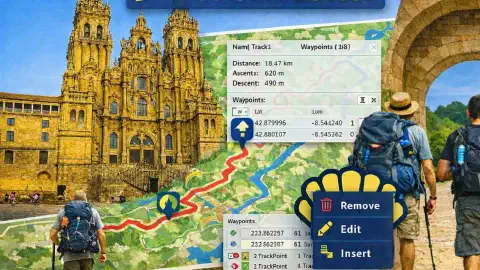
Free GPX Editor: Edit Track Names, Descriptions, Author, and Waypoints on the Camino
Posted: | Updated:
Reading time: 12 minutes
Posted: | Updated:
Reading time: 12 minutes


By: Simon Kemp , Editor
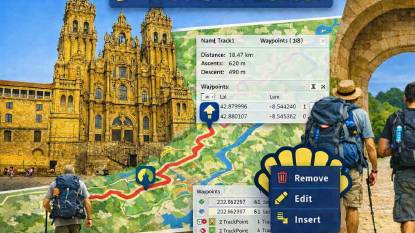
GPX Editor: change names, add notes, and make each route file your own
Every GPX file you download starts with whatever names the creator chose. You might get a file called “stage-04.gpx” with markers named “WPT001” and “WPT002”. That is fine for navigation, but it does not feel like yours.
Your Camino is personal. The albergue where you booked a bed. The cafe where you plan to stop for coffee. The viewpoint where you want to take a photo. These places deserve proper names and notes in your route file.
The GPX Editor lets you change all of that. It is one of our free GPX Tools.
Think of it like taking a borrowed book and writing your own notes in the margins. The route stays the same, but now it has your personal touch.
This guide explains everything slowly and clearly, even if you have never edited a GPX file before.
🧰 What the GPX Editor can do for you
Here is a simple overview of every feature. Do not worry if some terms are new. We explain them below.
| Feature | What It Means | Who It Helps |
|---|---|---|
| Load a GPX file | Pick a route file from your computer | Everyone starting with a route |
| Drag and drop | Drag a file straight onto the map | Anyone who finds clicking easier |
| Change the route name | Rename your file to something you will remember | Keeping your files organised |
| Add a description | Write notes about the stage, like “Tough climb but worth it” | Adding your own tips and reminders |
| Change the author name | Put your name on the file | Taking credit for your route |
| Change the date/time | Set the date you plan to walk | Organising files by date |
| See all markers (waypoints) | Browse a list of every pin in the file | Knowing what is in your route |
| Search for markers | Type a word to find specific markers | Quickly finding a particular pin |
| Edit a marker’s name | Rename “WPT001” to “Albergue San Nicolas” | Making markers meaningful |
| Edit a marker’s description | Add notes like “12 euros, bunk bed, book ahead” | Storing useful information |
| Edit a marker’s type | Set a category like “Albergue” or “Cafe” | Organising markers by what they are |
| See a marker’s location | View the exact coordinates of a marker | Checking where a pin is placed |
| Bulk actions panel | Select and edit many markers at once | Saving time with large files |
| Select all / Deselect all | Quickly tick or untick all markers | Speeding up bulk operations |
| Bulk rename with prefix/suffix | Add text before or after all selected marker names | Standardising names across a route |
| Delete selected markers | Remove multiple markers in one go | Cleaning up unwanted pins |
| Save Changes button | Apply all your edits and prepare the file | The main action to save your work |
| Download edited file | Save the modified file to your computer | The final step |
| Start Over button | Clear everything and start with a new file | Editing multiple files |
| Keyboard shortcuts | Press Ctrl+O to open, Ctrl+S to save | People who prefer using a keyboard |
| Collapse the control panel | Hide the side panel to see more of the map | Getting a bigger view of your markers |
| Works in your language | Buttons adapt to Spanish, French, German, and more | International pilgrims |
1. 📝 What the GPX Editor does (in plain English)
The GPX Editor is a name changer and note taker. You use it to personalise your route files.
What you can change:
- The name of the route (for example, from “stage-04” to “Day 4: Pamplona to Logrono”)
- The description of the route (add your own notes and tips)
- The author name (put your name on it)
- The date (set when you plan to walk)
- The names of markers (for example, from “WPT001” to “Albergue Municipal Pamplona”)
- The descriptions of markers (add prices, phone numbers, tips)
- The types of markers (set as “Albergue”, “Cafe”, “Fountain”, etc.)
- Delete markers you do not want
What it is NOT for:
- It is not for drawing new routes (use the GPX Builder for that)
- It is not for viewing route statistics (use the GPX Viewer for that)
- It is not for making files smaller (use the GPX Simplifier for that)
- It is not for splitting or joining files (use the GPX Splitter or Merger for that)
Think of the Editor as your personalisation toolkit. Every file becomes yours.
2. 🎯 When you might use this tool
Personalising your route files
The files you download from websites have whatever names the creator chose. The Editor lets you:
- Rename tracks to your own system (for example, “Day 1: SJPP to Roncesvalles”)
- Add descriptions like “Long stage, mostly flat after the first hill. Good cafe in Estella.”
- Put your name as the author so shared files are attributed to you
Adding notes to markers
Markers in GPX files often have boring names like “WPT005”. The Editor lets you:
- Change “WPT005” to “Albergue Municipal Roncesvalles”
- Add a description: “Bunk bed, 12 euros, communal dinner. Book in summer.”
- Set the type to “Albergue” so you can find it easily later
Cleaning up after merging files
When you merge multiple GPX files, you can end up with duplicate or unnecessary markers. The Editor lets you:
- Find duplicates by searching
- Select and delete the ones you do not need
- Rename the remaining ones with a consistent naming style
Preparing files to share
If you are sharing a route with other pilgrims:
- Give it a clear, descriptive name
- Remove markers that are personal to you
- Add descriptions that help others understand the route
3. 🗺️ What you see when you open the tool
When the page loads, you see:
The title at the top – It says “GPX Editor” with a short sentence explaining the tool.
The big map – This takes up most of the screen. Once you load a file, it shows your route and any markers.
The floating panel on the right – This small box contains all the editing controls. You can hide it by clicking the “minus” button if you want to see more of the map.
4. 📋 A closer look at the floating panel
4.1. Loading your file
At the top of the panel:
- A button that says “Choose GPX File” or similar
- A space showing the file name (starts with “No file chosen”)
- A hint that says you can also drag and drop a file onto the map
Click the button, find your GPX file on your computer, and select it.
4.2. ✏️ Editing the route details (metadata)
Once a file is loaded, a section appears with four editable fields:
Track Name – This is the name of your route. It might be something generic like “stage-04”. Change it to whatever you like, such as “Camino Frances Day 4: Pamplona to Logrono”.
Track Description – A small text box where you can write notes about this stage. For example: “Long day, mostly flat. Good lunch stop in Estella at 12 kilometres.”
Author – The name of the person who created the file. Change it to your name.
Time – A date and time picker. You can set the date you plan to walk this stage.
4.3. Working with markers (waypoints)
Below the route details, you see the markers section. It has:
- A header that says “Waypoints” with a number showing how many markers are in the file
- A Bulk Actions button (we explain this below)
- A search box where you can type to find specific markers
The marker list shows each marker. You can click on any marker to edit it.
4.4. The search box
Type any word in the search box, and the marker list instantly filters to show only markers with that word in their name. This is very useful when your file has dozens of markers and you need to find a specific one.
For example, type “albergue” and you will only see markers with “albergue” in the name.
4.5. 🪟 Editing a single marker (the edit window)
When you click on a marker in the list, a pop-up window appears. This is the edit modal. It has the following fields:
- Name – The marker’s current name. Change it to anything you like.
- Description – A small text box for notes about this place. For example: “Bunk bed, 12 euros, hot shower, WiFi.”
- Type – The category of the marker. You can type things like “Albergue”, “Cafe”, “Fountain”, “Viewpoint”, “Pharmacy”, or “Bus Stop”.
- Latitude – The exact location (north-south position). This is read-only, so you cannot change it, but you can see where the marker is located.
- Longitude – The exact location (east-west position). Also read-only.
At the bottom of the pop-up:
- Cancel – Closes the window without saving your changes
- Save – Saves your changes to this marker
4.6. The Bulk Actions panel
Clicking the Bulk Actions button opens a panel with more tools. This is useful when you want to make changes to many markers at once.
Select All / Deselect All – These buttons let you quickly tick or untick all markers in the list. Use Select All when you want to rename every marker. Use Deselect All to start fresh.
Bulk rename
This lets you add text before or after the names of selected markers.
- Prefix – Text added before the current name
- Suffix – Text added after the current name
- Apply – The button that makes the change
Example: You have markers named “Cafe”, “Albergue”, “Fountain”. If you type “CF-D14-” as the prefix and “-2026” as the suffix, they become “CF-D14-Cafe-2026”, “CF-D14-Albergue-2026”, “CF-D14-Fountain-2026”.
Delete selected
A red button that removes all selected markers from the file. Use this to clean up unwanted pins.
4.7. 💾 The Save Changes button
A green button that says “Save Changes” with a save icon. It is greyed out until you load a file. Click it when you have finished editing. The tool processes your changes and prepares the modified file.
4.8. 📊 The results box
After saving, a box appears with:
- A message: “Saved successfully”
- Download – Saves the edited file to your computer
- Start Over – Clears everything so you can edit a new file
4.9. Keyboard shortcuts (optional)
If you like using your keyboard:
- Press Ctrl+O to open a file
- Press Ctrl+S to save your changes
5. 👣 How to use the GPX Editor, step by step
Step 1: Load your file
Click Choose GPX File. Find the file on your computer and select it. Or drag and drop the file onto the map.
The file loads. The map shows your route and markers. The editing fields appear filled with the file’s current information.
Step 2: Change the route details
Look at the four fields under “Track Metadata”:
- Change the Track Name to something clear and meaningful
- Add a short Description with your own notes
- Set the Author to your name
- Set the Time to your planned walking date
Step 3: Look at your markers
Scroll down to the markers section. See how many markers the file has. Use the search box to find specific ones. Click a marker to see its details in the pop-up window.
Step 4: Edit individual markers
Click a marker to open the edit pop-up. Make your changes:
- Rename “WPT001” to “Albergue Municipal Pamplona”
- Add a description: “12 euros, bunk bed, hot shower. Arrive before 2pm.”
- Set the type to “Albergue”
- Click Save
Repeat for each marker you want to personalise.
Step 5: Use bulk actions (optional)
If you need to rename or delete many markers:
- Click Bulk Actions
- Use the search box to find specific markers
- Click Select All or tick individual markers
- To rename: type a prefix or suffix and click Apply
- To delete: click Delete Selected
Step 6: Save your work
Click Save Changes. Wait a moment. The results box appears. Click Download to save your edited file.
Step 7: Edit another file (optional)
Click Start Over to clear the current file and load a new one.
6. 🥾 Real examples of how pilgrims use this tool
Personalising all stage files before departure
Maria has 30 stage files for her Camino. She opens each one in the Editor, changes the track name to something meaningful (like “Day 7: Burgos to Hontanas”), adds a short description with tips from her guidebook, and renames markers from “WPT001” to real place names. After two hours, she has a complete set of personalised, annotated route files.
Adding accommodation details
Carlos has a GPX file with markers at towns but no specific albergue information. He uses the Editor to:
- Rename each town marker to the actual albergue name
- Add the price and phone number in the description
- Set the type to “Albergue”
Now when he looks at the map on his phone, he can see exactly where his bed is waiting and how much it costs.
Cleaning up a merged route
After merging 30 stage files, Anna finds she has duplicate markers and some old markers from a previous version. She loads the merged file in the Editor, searches for duplicates, selects them, and clicks Delete Selected. She saves the cleaned file.
Standardising names across a route
Tom’s GPX files use inconsistent naming. Some markers are in Spanish, some in English. He loads each file, uses Select All, applies a prefix like “CF-D14-”, then individually edits key markers to add proper names. By the end, his entire route has a consistent naming system.
7. 💡 Simple tips for good results
- Edit the route name first – Change the name and description before editing markers. It gives you context for your decisions.
- Use clear marker names – Instead of “WPT001”, use “Cafe Bar Paco” or “Albergue San Nicolas”. Your future self will thank you.
- Add useful descriptions – Prices, phone numbers, and tips stored in marker descriptions can be seen from most navigation apps.
- Use type tags consistently – Stick to the same types: “Albergue”, “Cafe”, “Fountain”, “Pharmacy”, “Viewpoint”, “Bus Stop”. This makes searching easy later.
- Search before bulk actions – Use the search box to find markers by name or type before applying bulk changes.
- Keep a copy of the original – Save the original file before making lots of edits. You can always go back.
- Combine with other tools – Edit markers in the Editor, then use the Simplifier to make the file smaller.
8. ✅ Quick summary
The GPX Editor is your personalisation tool. It turns generic route files into something that is truly yours.
- If you are new, it means: “I can rename boring markers to places I actually recognise and add notes I will read on the trail.”
- If you have walked before, it means: “I can standardise names across an entire route, add detailed notes, clean up duplicates, and prepare files that feel like mine.”
All of our GPX tools live on our Camino Resources Hub, along with other helpful planning materials for your Camino. This tool is part of the full Camino GPX Tools suite.
GPX Editor Video
Join Us & Get Your Free Downloads!
Signup to our newsletter today to get your free Camino downloads. Get notified about new updates & deals.
