Free GPX Builder: Draw Your Own Custom Camino Route on a Map
Posted: | Updated:
Reading time: 11 minutes
Posted: | Updated:
Reading time: 11 minutes


By: Simon Kemp , Editor
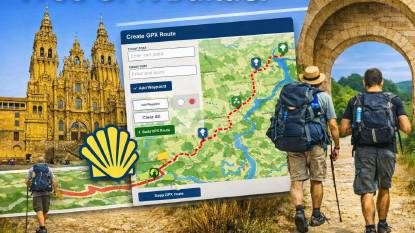
GPX Builder: draw your own walking route on a map
Not every Camino follows the same path. Maybe you want to walk a coastal route that the usual stage files do not cover. Perhaps you need shorter days than the standard stages. Or maybe you simply want to draw your own line on a map and call it your Camino.
The GPX Builder lets you do exactly that. It is one of our free GPX Tools.
Think of it like a digital pencil and paper. You open a map, click to place dots along the path you want to walk, and the tool connects them into a route. You can name your route, add markers for places you want to stop, and see how far and how hilly your route is. When you finish, you download a file that works on your phone, your GPS watch, or any navigation app.
This guide explains everything slowly and clearly, even if you have never used a tool like this before.
🧰 What the GPX Builder can do for you
Here is a simple overview of every feature in the tool. Do not worry if some of these terms are new. We explain them all below.
| Feature | What It Means | Who It Helps |
|---|---|---|
| Draw a route from scratch | Click on the map to place dots. The tool connects them into a path. | Everyone who wants a custom route |
| Map you can move and zoom | Drag the map to see different areas. Zoom in for detail, zoom out for the big picture. | Anyone following a path on a map |
| Name your route | Type a name like “My Camino Day 1” before you save. | Keeping your files organised |
| Add your name as author | Type your name so people know who made the route. | Sharing routes with friends |
| Add markers (waypoints) | Drop a pin on the map and give it a name, like “Cafe” or “Albergue”. | Marking places you want to remember |
| See how far your route is | The tool shows you the distance in kilometres as you draw. | Planning how long each day will take |
| See how much climbing there is | The tool shows how much you go up and down. | Knowing if a day will be tough |
| See the average steepness | The tool shows the average slope of your route. | Understanding the terrain |
| Undo and Redo buttons | Take back a mistake or put it back again. | Fixing errors as you draw |
| Clear button | Wipe everything and start fresh. | Trying different ideas |
| Export (download) your route | Save your finished route as a file for your phone or GPS. | The final step before you walk |
| Collapse the control panel | Hide the side panel to see more of the map. | Getting a bigger view of your route |
| Works in your language | Buttons and labels adapt to languages like Spanish, French, German, and more. | International pilgrims |
1. 🖊️ What the GPX Builder does (in plain English)
The GPX Builder is a drawing tool. Imagine sitting at a table with a paper map and a pencil. You draw a line showing the path you want to walk. Then you add little stars for places you want to stop. Then you measure how long the line is.
The GPX Builder does all of that on your computer screen.
What you can do with it:
- Open a blank map
- Click to place dots along your desired path
- The dots connect into a line showing your route
- Give your route a name (like “Day 3: Porto to Barcelos”)
- Add your name as the creator
- Drop markers at places like albergues, cafes, or viewpoints
- Watch the distance and climbing numbers update as you draw
- Save and download your route when you are happy
What it is NOT for:
- It is not for editing routes someone else made (use the GPX Editor for that)
- It is not for viewing routes (use the GPX Viewer for that)
- It is not for making files smaller (use the GPX Simplifier for that)
Think of the Builder as your blank canvas. You start with nothing and create something.
2. 🎯 When you might use this tool
If you are new to the Camino
- You want to plan your own stages instead of following guidebook stages that might be too long or too short
- You want to add a detour to see something special, like a famous church or a beautiful viewpoint
- You want to understand what a GPX file is by making one yourself
If you have walked before
- You want to mix parts of different Caminos together, like starting on the coastal route and switching inland
- You need to create shortcuts or extensions that official files do not cover
- You are planning for a group and need routes at a specific distance
- You are cycling or using an e-bike and need routes that follow roads instead of narrow paths
3. 🗺️ What you see when you open the tool
When the page loads, you see three main things:
The title at the top – It says “GPX Builder” with a short sentence explaining the tool.
The big map – This takes up most of the screen. It shows a standard map of the world. You can click and drag to move the map around. You can scroll or use the buttons to zoom in and out. This is where you will draw your route.
The floating panel on the right – This is a small box sitting on top of the map in the top-right corner. It contains all the buttons and settings you need. You can hide it by clicking the “minus” button if you want to see more of the map.
4. 📋 A closer look at the floating panel
4.1. The name fields (track name and author name)
These are simple text boxes at the top of the panel.
Track name: Type a name for your route here. Something like “Camino Portuguese Day 1” or “My Coastal Detour”. This name will be saved inside your file, so when you open it on your phone later, you will see this name.
Author name: Type your name here. If you share the file with other pilgrims, they will see who made it.
4.2. The marker name field (waypoint name)
This box has a small pencil icon next to it. You use it to name the markers you drop on the map.
Here is how it works:
- Type a name in this box, for example “Albergue Municipal”
- Click the marker button on the map (a pin icon)
- Click on the map where the albergue is located
- A pin appears with the name “Albergue Municipal”
You can do this for cafes, viewpoints, water fountains, bus stops, or anywhere else you want to remember.
4.3. 📊 The statistics panel
This panel is hidden at first. It appears once you start drawing your route. It shows four numbers that update as you draw:
- Distance – How long your route is in kilometres. A typical walking day on the Camino is 20 to 25 kilometres.
- Ascent – How many metres you climb in total. A flat day might be 100 metres. A hilly day might be 500 metres or more.
- Descent – How many metres you go down. This tells you if you have a long downhill section.
- Average grade – The average steepness. A low number means gentle walking. A high number means consistently steep terrain.
These numbers help you decide if a stage is right for you. If the distance is too long or the climbing is too much, you can adjust your route before you walk it.
4.4. Undo, Redo, and Clear
Three simple buttons:
- Undo – Takes back your last action. Made a wrong click? Just press Undo.
- Redo – Puts back something you just undid.
- Clear – Deletes everything and lets you start over. Use this when you want to try a completely different idea.
4.5. ⬇️ The Export button
At the bottom of the panel, there is a green or blue button that says “Export GPX” or similar. This is how you save your finished route.
When you click it, a small window pops up saying “Fetching GPS Data…” with a spinning circle. This means the tool is working out the elevation (climbing) data for your route. After a few seconds, the file downloads to your computer.
5. 👣 How to use the GPX Builder, step by step
Let us walk through it together.
Step 1: Open the tool
Go to the GPX Builder page. Wait for the map to load. You should see the map, the title, and the floating panel on the right.
Step 2: Name your route
Before drawing anything:
- Click in the Track Name box
- Type something clear, like “Day 1: SJPP to Roncesvalles”
- Click in the Author Name box
- Type your name
This means your file will be properly labelled from the start.
Step 3: Start drawing
Look at the map. On the left side, you should see a small toolbar with drawing tools. The exact buttons depend on the tool, but you are looking for something that lets you draw a line.
- Click the draw line or draw path button
- Move your mouse to where you want your route to start
- Click once to place the first dot
- Move your mouse along the path you want to walk
- Click again to place the next dot
- Keep clicking to build your route, dot by dot
- When you reach the end, double-click or click the finish button
A line will appear on the map connecting all your dots. This is your route.
Tips for drawing well:
- Zoom in close when you are at junctions or village streets. This helps you place dots accurately.
- Zoom out between towns to see the big picture and draw smoother lines.
- Do not worry about making mistakes. You can always use Undo.
Step 4: Add markers for important places
While drawing or after you finish, you can add pins for places you want to remember:
- Type a name in the marker name box, for example “Cafe Bar Paco”
- Click the marker or pin tool on the map toolbar
- Click on the map where the cafe is located
- A pin appears with the name you typed
Good things to mark include:
- Albergues where you have booked a bed
- Cafes or restaurants for lunch
- Water fountains
- Pharmacies
- Viewpoints
- Bus stops or train stations (in case you need to skip a section)
Step 5: Check your numbers
Look at the statistics panel. Ask yourself:
- Distance: Can I walk this far in one day? Most people walk 20 to 25 kilometres comfortably.
- Ascent: Is the climbing too much for me? A day with 300 to 500 metres of climbing is normal. Over 800 metres is a tough day.
- Descent: Will my knees be okay with this much downhill?
- Average grade: Is the route mostly flat or mostly steep?
If the numbers do not feel right, you can adjust your route. Add more dots to take a gentler path. Remove dots to shorten the distance. Use Undo to try a different way.
Step 6: Download your route
When you are happy:
- Click the Export GPX button
- Wait for the “Fetching GPS Data…” message to finish
- The file will download to your computer
You can now transfer this file to your phone, your GPS watch, or your navigation app. If you need help with that, check our guide on GPX files and compatible devices.
6. 🥾 Real examples of how pilgrims use this tool
Making a shorter stage
Maria is 65 and does not want to walk 25 kilometres every day. She looks at a standard stage file, sees it is too long, and uses the Builder to create her own route ending at a village 15 kilometres away.
Building a custom hybrid route
Paulo wants to walk the coastal Camino del Norte but needs to finish in Santiago for his Compostela certificate. He draws a route that follows the coast for two weeks, then cuts inland to join the Camino Frances for the final 100 kilometres.
Planning a cycling route
Anna is cycling the Camino and cannot use the same paths as walkers. She uses the Builder to follow roads instead of trails, avoids steep hills, and adds waypoints for bike shops along the way.
7. 💡 Simple tips for good results
- Zoom in at tricky spots – When you reach a village or a junction, zoom in close. A few metres can make the difference between following the right road or the wrong one.
- Name your file clearly – Use names like “CF-Day-1-SJPP-Roncesvalles.gpx” so you know what each file is.
- Watch the numbers as you draw – The distance and climbing stats update instantly. They are your best guide to whether the route is right for you.
- Add markers as you go – It is much easier to drop a pin when you are looking at the spot on the map than to remember it later.
- Save a draft early – If you are drawing a long route, click Export halfway through to save a copy. You can always load it again later.
- Use with other tools – After building, you might want to use the GPX Simplifier to make the file smaller, or the GPX Merger to combine several short stages into one.
8. ✅ Quick summary
The GPX Builder is your way to create a completely personal route for the Camino.
- If you are new, it means: “I can plan a day that fits my pace, not someone else’s.”
- If you have walked before, it means: “I can build any route I can imagine.”
All of our GPX tools live on our Camino Resources Hub, along with other helpful planning materials for your Camino. This tool is part of the full Camino GPX Tools suite.
GPX Builder Video
Join Us & Get Your Free Downloads!
Signup to our newsletter today to get your free Camino downloads. Get notified about new updates & deals.
